How-To videos, additional resources, useful and helpful tips.
We recommend watching the videos in full view HD.
1
Double Tail - Use 1
2
Double Tail - Permissioned Entry Bars
2nd Wave Trading
2nd Wave Trade 0.16.17
2nd Wave Trade 01.18.17
2nd Wave Trade 01.18.17
2nd Wave Trade 01.21.17
2nd Wave Trade 02.01.17
2nd Wave Trade 02.07.17
2nd Wave Trade 02.23.17
2nd Wave Trade 02.23.17 (second trade)
2nd Wave Trade 02.24.17
2nd Wave Trade 03.07.17
2nd Wave Trade 03.08.17
More Coming Soon!
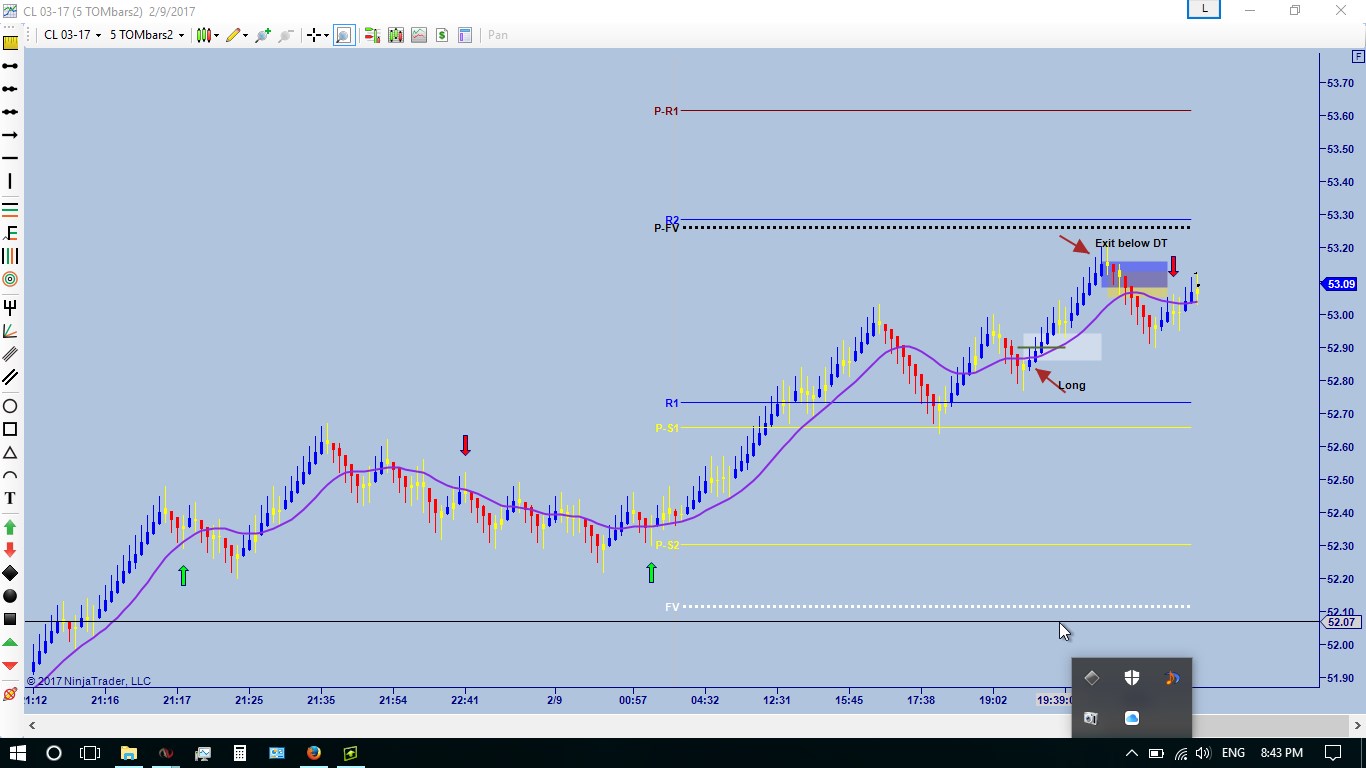
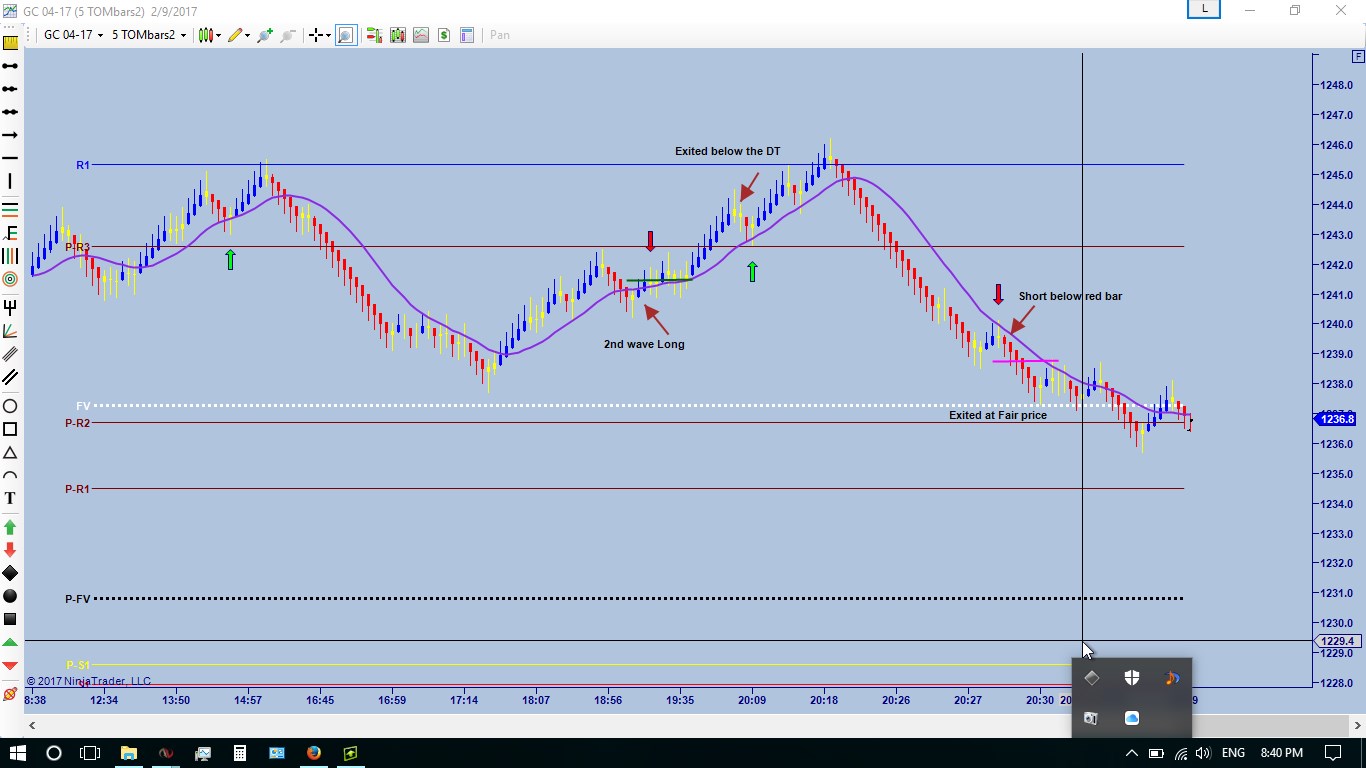
2nd Wave Trade Examples
CL 03-17 5 TOMBars2
CLICK TO ENLARGE
GC 04-17 5 TOMBars2
CLICK TO ENLARGE
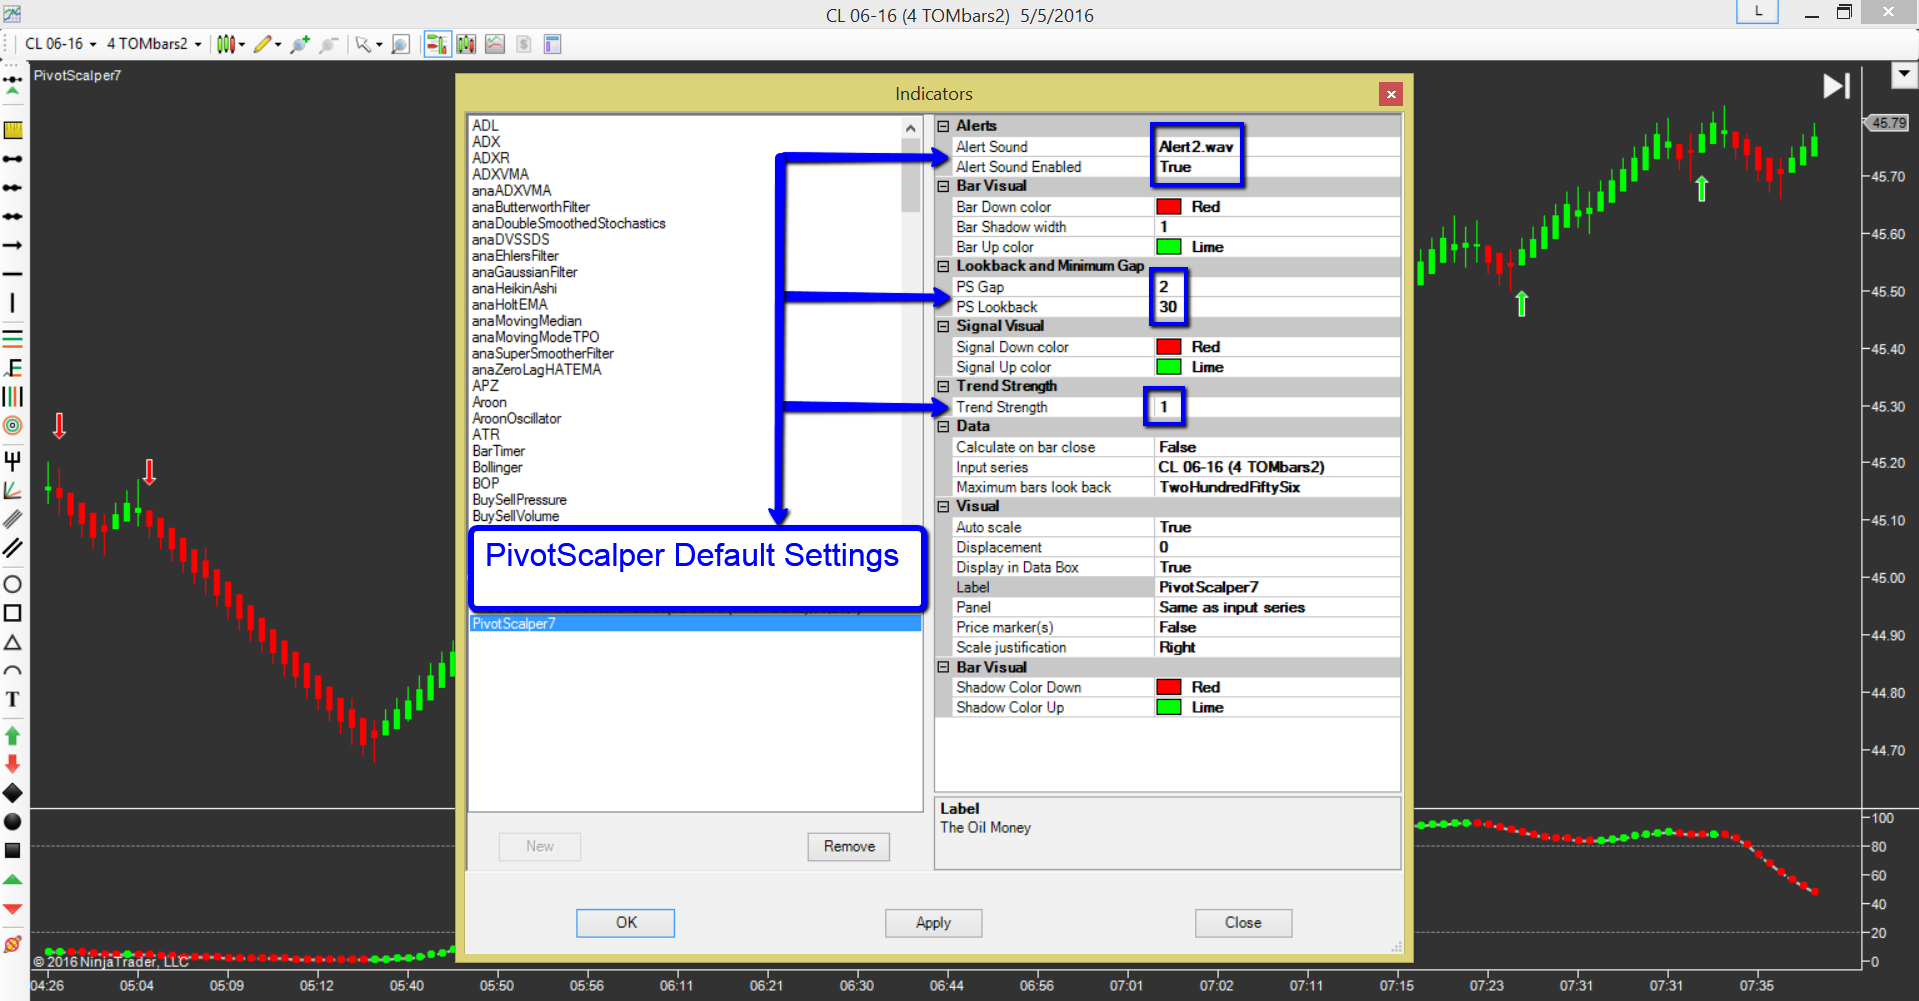
Pre and Post Trade Check-List
One of our members Taylor W. created this image that I found to be very useful especially for beginners to hone their discipline and make sure to not enter a trade until they have gone through their check list to make sure the market and chart conditions are optimal.
You can’t take every signal, every signal will not be a good trade. But if you take a signal that comports with your check list, almost every trade you take will be a winner. There are exceptions and there will be losing trades, what we are after is the HIGHEST PROBABILITY TRADES possible and that is what you get with Pivot-Scalper-2 especially when you incorporate this Traders Check List into your game.
Pilots have a Pre-Flight Check-List
Doctors have a Pre-Surgery Check-List
Race Car Drivers have a Pre-Race Check-List
Lawyers have a Pre-Trial Check-List
Now you have a Pre and Post Trade Check-List, USE IT…

CLICK TO ENLARGE
This image shows two perfect Pivot-Scalper/Double-Tail entries. These kinds of signals will result in winning trades 99% of the time. If you are patient and wait for them, you will be a big winner.
If you chose to trade Double-Tail without a Pivot-Scalper Arrow, that’s cool to but make sure you are only entering on a Higher Pivot Low or a Lower Pivot High in an established trend and you will be good.

Click to Enlarge